Count down calendars are fun way of awaiting Christmas, not only for children…

MATERIALS
for one calendar
- 6 kitchen roll tubes (cut into 4 pieces) or 2-3 gift wrap tubes
- 24 blank stickers (I used heart shaped ones)
- wrapping paper
- aluminium foil
- 24 little sweets
- 24 little gifts
- PVA glue
- ribbon
- large bead or button

EQUIPMENT
- stapling plier
- permanent marker and pencil
- scissors
- paint brush
- large needle or some sharp pointy tool


METHOD
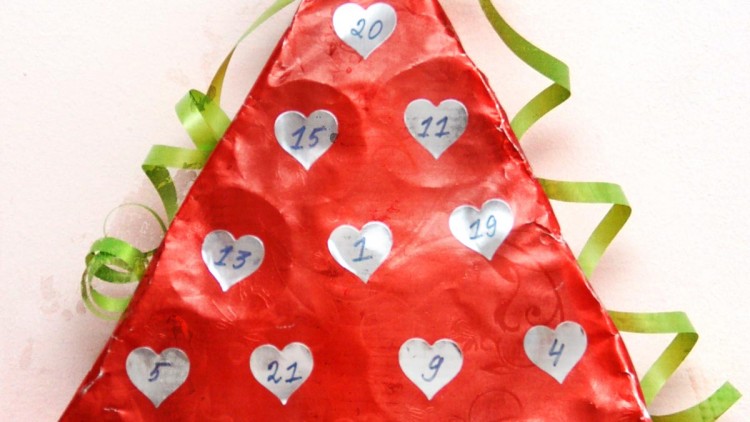
- Staple pieces of the tubes in desired shape, I made two tree shapes but round or oval bauble shape would be good as well, too.
- Write numbers from 1 to 24 on the stickers using permanent marker.
- For each calendar cut out two pieces of the wrapping paper, one bigger so it would also cover the sides of the tubes for the back and second smaller, only a bit bigger than the shape, for the front.
- Glue the wrapping paper on the tubes.

5. Once back of the calendar is covered in wrapping paper prepare the hanger out of ribbon and a bead (or button), if you just make a knot weight of the calendar may rip it out.
6. Fill each compartment with some sweet and little gift, wrap each duo in aluminium foil if they are small enough to fall in between layers of paper and the tubes to avoid morning dramas… It happened to us with ready made calendar once, my daughter opened the flap and there was no chocolate, same next day… later we have found out the chocolates have fallen in between layers of the calendar and were sitting on the bottom of the box.
7. Cover and glue the remaining piece of paper to seal the calendar.
8. Stick on the numbers and voilà, your DIY up-cycled cardboard rolls calendar is ready (!)

NOTES
If you have any fillers left they will come handy later on as stocking fillers.
More countdown calendars.
What a cute and easy idea!!!
Claire xx
How easy was it to punch out the individual days?
It wasn’t very easy because our paper was very thick, more like aluminium foil, but all of the other “gifts” stayed in place till the end… unlike in some chocolate calendars we had in the past.
What a clever idea for a christmas gift! Definitely bookmarking this one for future reference!
What a great idea!
Haven’t tried it yet but looking forward to !! :-)
Going to try this one….looks fab….xx